
Any reasonably competent home handyman can install hardwood flooring on a roughed in wood floor base, see Figure 1. The quality levels of today’s manufacturing processes insure that adjoining slats or boards fit to create a level floor. Micro beveling of the board edges create splinter free slats and make it much easier for the home handyman to create a professional installation.

Figure 1 - Hardwood flooring installed on a wood sub-floor
However, in order to ensure you lay the perfect
floor, it is important that certain items are taken care of:
Windows:
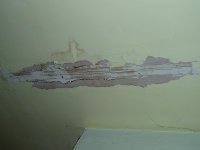
Figure 2 - Water damage below window
Why check the windows if you are installing a floor? Good question! Check to make sure that the windows do not leak and that the drywall or plaster below the windows are in good shape. You don’t want to be replacing drywall or plaster directly above a new hardwood floor. If you have window or wall problems (Figure 2) fix them before you install the hardwood flooring.
Painting:
If you are planning on painting the room paint it before you install the hardwood flooring, for two reasons. The first is that you don’t want to get paint on the floor and the second is that you don’t want to use a ladder on a new hardwood floor, it can leave footmarks.
Baseboard:
If there is an existing baseboard and/or quarter-round they should be removed. Check for, and remove, any finishing nails that may have pulled through the baseboards and be left in the walls.
Doorframe Trim:
It is easier to remove doorframe trim molding and then reinstall it so that it sits on the hardwood floor. However, it is possible to undercut doorframe trim to allow for the placement of the hardwood under the trim.
Doors:
Removing doors makes installation easier and allows for trimming the bottom of the doors to accept the increased thickness of the floor.
Squeaks:
Check the sub-floor for any squeaks and repair by adding screws through the plywood or sub-floor material into the floor joists. It is important to note that the installation of the hardwood flooring will not correct or eliminate any squeaks in the sub-floor.
Additional information on: Repairing squeaky floors
Soft Spots:
Walk on the sub-floor and try to detect any soft spots. These are areas where the sub-floor sags when you walk on it. These areas should be corrected from below by adding extra support between the floor joists.
Protruding Screws and Nails:
Any screw or nail heads that are not level or recessed into the floor must be corrected. Where chipboard is used as the sub-floor material, it is not uncommon for screw heads to raise pieces of the chipboard around the screw. These bubbles must be removed with a block plane, belt sander, or wood rasp.
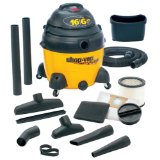
Figure 3 - Shop vac
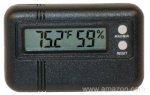
Figure 4 - Temperature & humidity gauge.
Sweep and Vacuum:
The floor must be free of all debris, and dirt. Don’t forget to vacuum (Figure 3) the area between the plaster or drywall and the sub-floor. Often small pieces of plaster, nails and screws will wedge themselves in that area and for sure, they will end up under one of the flooring boards as you are attempting to nail it down.
Acclimatize the Flooring:
One of the biggest mistakes made when installing hardwood is not allowing the slats or boards to acclimatize to the home. Hardwood swells and shrinks with temperature and humidity (Figure 4). Hardwood should be acclimatized for a minimum of 48 hours, some manufacturers recommend 72 hours before installation. Follow the manufacturer’s instructions.
Additional information on: Acclimatizing hardwood flooring
Additional information on: Hardwood Flooring FAQ's