After you have completed the frame of the concrete countertop mold the next step is to insert the aluminum divider. The aluminum divider should be sized so that it fit tightly in the kerfs that were previously made in the base and side walls of the mold. In the case of our example we have two pieces of aluminum because the center of the concrete countertop was in a position where the sink cut the aluminum divider into two pieces. The height of the divider, after it is placed in the kerf, should be 1/16 of an inch below the sidewalls of the mold. This allows you to screed and trowel the surface comfortably. The 1/16 inch of concrete above the aluminum divider will break away and as it is on the bottom of the concrete countertop any small chipping will not be noticeable.
Spray the aluminum divider with the Varathane, on both sides and on the edges and allow it to dry.
Place some of silicone adhesive caulk in the kerf on the bottom and side rails of the mold and push the aluminum dividers into place. Remove any excess silicone adhesive with a cloth and alcohol and/or razor blade knife. You do not want to have the silicone caulk for the divider show on the inside of the mold, as you do not want these edges to be rounded.
Once you have all of the sides for the concrete countertop in place including the sides for the sink hole, if a sink is part of your countertop you should inspect and ensure:
- the sink hole is in the correct position.
- all seams have been caulked with silicone adhesive and that the mold is watertight.
- the sides are square.
- all the support sides of the mold are well fastened to the base of the mold and the workbench.
- the mold is truly level. If the mold is not level, it will be thicker at one end than the other causing major problems when you place it on the base cabinets.
The final step is to insert spacers in the mold for the faucet and any other accessories that you may require a hole to be placed in the concrete countertop.
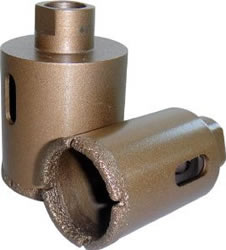
Note: All is not lost if you accidentally forget to place a hole or if after building the concrete countertop your better half wants to have a new accessory installed. You can place a hole in the concrete countertop, after it has cured, using diamond tipped hole saws, as shown in Figure 14.

Figure 14 - Diamond hole saw
For the purpose of the example we will assume that the faucet requires a single hole and has a standard stem designed for use in a 1 1/2 inch thick countertop. As our countertop is 2 1/2 inches thick we will construct a "mushroom" as a spacer.
The mushroom spacer is made from a piece of 1 1/2 inch PVC pipe and two 2 1/2 inch diameter discs of 3/4 inch plywood, wrapped in packing foam and then covered in cellophane tape.
Note: The diameter of the PVC pipe and the plywood discs is to allow clearance for the faucet stem and faucet mounting hardware. The diameter of the discs you need will be based on the mounting hardware requirement of the faucet you have purchased.
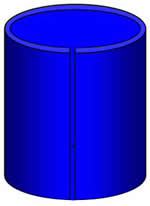
Cut a piece of 1 1/2 inch PVC pipe 1 inch long. Then cut a slit in the pipe length wise, as shown in Figure 15.
<
Figure 15 - PVC pipe with slit
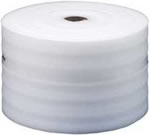
Wrap the PVC pipe with a single layer of 1/8 inch thick sheet packing foam, as shown in Figure 16.

Figure 16 - Packing foam
Then cover the sheet packing foam with one layer of cellophane tape, trimming off the excess with a razor blade knife.
Note: If you have a number of holes that are close together, where the plywood discs would overlap you can make a large indent using oval pieces of plywood to accommodate a number of PVC pipe pieces.
Ensure that you have at least 1 1/2 inch of concrete in all directions from the sides of the PVC pipe.
To mount the mushroom spacer, use a long flat head screw, through the plywood and into the base of the mold. Make sure that the head of the screw is flush with the top of the plywood and that the top of the mushroom is at the same height as the sides of the mold. Use a level across the mold!
Place a small amount of modeling clay on top of the screw head to prevent concrete from filling the screw head when you do the pour. You need to be able to remove the screw after the concrete has cured.
The mold is complete, less rebar and wire mesh. Cleaning the mold is very important as concrete will mold itself around any dust and grime. This includes making sure that there is no ink from lines that you may have drawn on the mold and/or chemicals from your hands. This is one of the reasons to wear latex gloves while building the mold.
Vacuum the mold thoroughly (be careful not to scratch the laminate surface of the mold with the vacuum cleaner nozzle) and wipe the surface down with acetone or alcohol.
Fill all the screw heads inside and outside of the mold with some modeling clay to prevent cured concrete from preventing you access to the screw heads. You must be able to remove the screws in order to release the mold from the cured concrete countertop.
Continued - Rebar and wire mesh reinforcement for your concrete countertop
How to Make Concrete Countertops - Index
