
Many homeowners do not like the visual appearance of the mirror clips commonly used to hang or install mirrors on walls and doors. For those homeowners there is an alternative to using mirror clips to hold the mirror in position and that is to mount the mirror using a specially formulated mastic or adhesive, as shown in Figure 1.
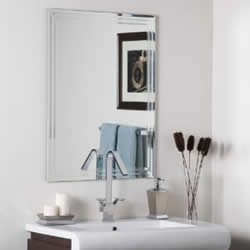
Figure 1 - Frameless bathroom mirror
Warning: Mirrors are heavy and can be dangerous if they come off a wall unexpectedly. If you are in any doubt about your abilities to hang or install a mirror using a mastic or adhesive, hire a professional!
Note: If you are installing a wall-to-wall and/or backsplash to ceiling mirror make sure that the mirror fits the space, exactly as you want it, before you apply any mastic or adhesive to the back of the mirror or walls.
The dry run fitting must include making sure that any cut-outs, in the mirror, for electrical outlets (receptacles) and/or switches are in the correct location.
Note: The mirror installation instructions described here are a guide. Always follow the manufacturer’s instructions for the mirror mastic or adhesive that you have purchased.
Note: The easiest mirror mastic or adhesive to use comes in a tube that allows you to deliver the mastic to the mirror and the wall with the use of a caulking gun.
- Wash the surface of the wall where the mirror is to be installed or hung. The wall must be completely and thoroughly clean. Dry the wall and ensure that it is moisture and damp free.
- If you have a small mirror, similar to that shown in Figure 1, you can use mirror clips on the bottom and sides or top, to temporarily support the mirror in its final position until the mirror mastic or adhesive has cured.
- If the mirror is not wall to wall, place the mirror on the wall in its final position and make an outline of the mirror shape on the wall.
- Using the caulking gun, apply the mirror mastic or adhesive using a zig-zag pattern to the wall and to the back of the mirror. Keep the mastic or adhesive at least 2 inches from the edges of the mirror. The mirror mastic or adhesive will spread out as it is compressed between the wall and the back of the mirror. Leaving a 2 inch gap should prevent the mastic from spreading out past the edge of the mirror.
- Place the mirror in position and apply slight pressure to the center of the mirror to force the mirror mastic or adhesive to spread out. Apply slight pressure to the edges of the mirror with the same intent to spread the mirror mastic or adhesive between the wall and the back of the mirror.
- Once you are comfortable that the mirror mastic or adhesive has spread out between the mirror and the wall install the mirror clips or strips of wood to temporarily hold the mirror in position until the mirror mastic or adhesive has cured.
- Allow the mirror mastic or adhesive to cure for at least 24 hours before you remove any of the temporary wood strips or mirror clips.
- Repair and touch-up any screw holes that have been left when the temporary wood strip mirror supports and/or mirror clips have been removed.
Note: If any of the paint on the wall is flaking it must be removed prior to installing or hanging the mirror.
The mirror mastic or adhesive takes time to cure and for that reason it is necessary to use mirror clips and/or a support block to ensure that the mirror does not slip or slide while the mastic or adhesive is curing.
If the mirror is large, but does not go wall to wall, you can use mirror clips or a piece of wood on the bottom and use mirror clips on the top or sides, to temporarily support the mirror in its final position until the adhesive has dried.
The use of a strip of wood is generally more convenient than using mirror clips as the piece of wood is easier to place in a level position. Make sure that the strip of wood is screwed into studs and not just plaster or drywall, as shown in Figure 2.
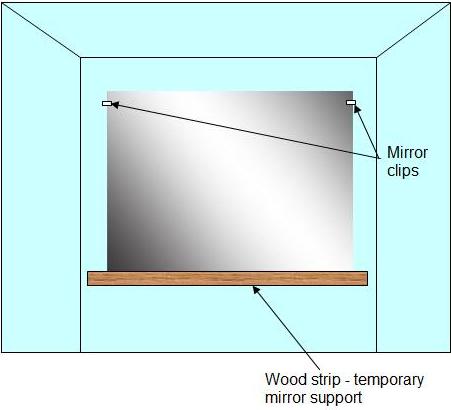
Figure 2 - Supporting a non wall-to-wall mirror
If you have a rectangular mirror that is wall-to-wall and backsplash to ceiling the mirror will rest on the backsplash but should be supported in the corners to ensure that it does not fall forward from the top.
The use of a strip of wood, temporarily screwed into the adjacent walls will hold the mirror in position until the mirror mastic or adhesive has cured, as shown in Figure 3.

Figure 2 - Supporting a wall-to-wall mirror
Note: If any mirror mastic or adhesive has spread out past the edges of the mirror clean it from the wall and the mirror.