
Motion detectors can be self contained or an integral part of a light fixture. In either case to have the motion detector perform its function in the manner you desire takes some adjustment to its sensitivity and positioning.
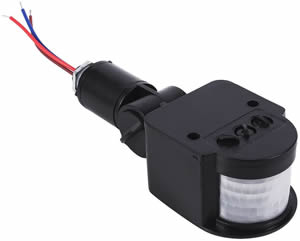
Self Contained motion detector.
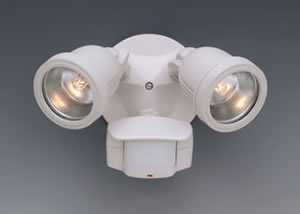
Integral, with light fixture motion detector.
Adjusting and Testing:
Note: Read the specific instructions, that have been included by the manufacture, for your motion detector.
- Every motion detector has a switch that switches the unit from operational mode to test mode. The switch may also have an off position. Locate the switch, usually located on the bottom of the motion detector, and set it to the "TEST" position.
- The motion detector will also have an adjustment for sensitivity. This may be set with a screwdriver or small knob. Locate the sensitivity adjustment and set it for a "MEDIUM" level. If the sensitivity adjustment is not marked with levels, turn the screw or knob to the halfway position.
- With the light circuit powered, if there is a wall switch in the circuit, ensure that it is also "ON", the light fixture or fixtures connected to the motion detector should light for approximately 30 seconds and then go off.
- To adjust the field of vision of the motion detector, manually set the motion detector head in the direction of the area that you desire activation of the lights. Proceed to the furthest point of the detection area and see if the light or lights are activated.
- If the light or lights go off and on while the detector is in the "TEST" mode, the lamp position is interfering with the detector. Aim the lamps away from the detector by adjusting the lamp holders. Direct the lamps away from the detector. As a general rule, do not allow the lamps to be closer than 1/2 inch from the detector.
- Using the sensitivity adjustment you can set the motion detector to activate at different distances within the detection zone. This testing is a trial and error method. Set the sensitivity adjustment, proceed to the detection area and if necessary adjust the sensitivity until you reach the desired result. The motion detector will turn off after approximately 4 seconds of no motion within the detection area.
- After you have completed the sensitivity adjustment, set the slide switch to the "ON" position.
Note: If there is any motion within the motion detectors field of vision, the lights will stay on for a longer period. When performing the test it is best to stand perfectly still or out of the line of vision of the motion detector.
Note: Always point the lamp holders with a slight downward profile in order to avoid having the lamp holders fill with water which could cause the lamp to burn out or a short circuit within the lamp socket.
Two types of motion detectors are available:
- Standard
- Wide Angle
Wide angle motion detectors will activate on movement, in an area, as much as 75% greater than a standard motion detector. A wide angle motion detector can cause lights to blink due to extraneous movements, including tree branch movement. If you wish to reduce the field of vision of wide angled motion detector it can be accomplished by reducing the sensitivity and/or by using tape over the detectors field vision window. Taping the motion detector's field vision window will not damage the detector in any manner.
Motion detectors will change their sensitivity and field of vision over time. This can be caused by:
- Dirt on the field vision window,
- Low power (brown outs),
- Obstacles such as new trees, shrubs, bushes, sheds, fences may change the motion detectors field of vision.
- Age
Additional information on motion detector installation