- Damaged floor joists.
- Separation of sub-floor from joists.
- The most efficient way to correct this problem is to add fasteners (flooring screws) to the sub-floor into the floor joists. However, in many instances this is not realistic due to the finished flooring material that is currently fastened to the sub-floor.
If, after inspecting the floor joists, you have noted a floor joist that is split or cracked, as shown in Figure 6, it will need to be properly repaired.

Figure 6 - Split floor joist
In order to repair a floor joist that has split, it is necessary to jack up both sides of the floor joist, as shown in Figure 7, until the joist is back in a level position.
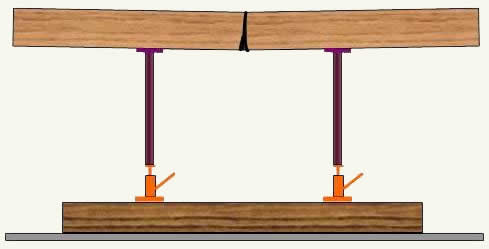
Figure 7 - Jacking up a split floor joist
Using the hydraulic jack, jack up each side 1/8 inch at a time. Do not try to jack up one side of the floor joist to level and then the other side. This will create undue pressures on the floor and walls above the split floor joist
It may be necessary to use a chisel or reciprocating saw to remove any pieces of lumber that are hindering the joist from returning to a level position.
Once the floor joist is level it can be repaired by taking two pieces of the same size lumber stock and attaching it to both sides of the damaged floor joist. Use nails to hold the pieces in place temporarily and then use construction adhesive in conjunction with 1/2 inch minimum diameter, carriage or machine bolts, with heavy washers, in a dice pattern 5 layout to hold the splints in permanently. When installing the bolts next to the split, back away from the split in order to have non damaged floor joist lumber where the bolts are going to be located. The splints should extend a minimum of 2 feet on either side of the split, as shown in Figure 8.
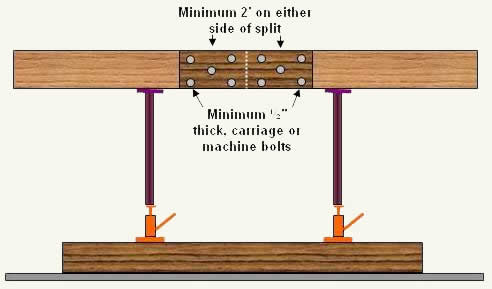
Figure 8 - Split floor joist repaired
There are instances that a squeaky floor is created when the sub-floor has separated from the floor joists, as shown in Figure 9. This can be caused by a sagging floor joist although most of the time it is caused by a lack of fasteners being used to hold the sub-floor in place or incorrect fasteners being used.
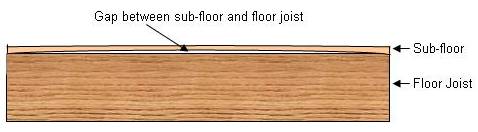
Figure 9 - Gap between floor joists and sub-floor
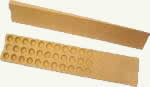
Figure 10 - Composite material shims
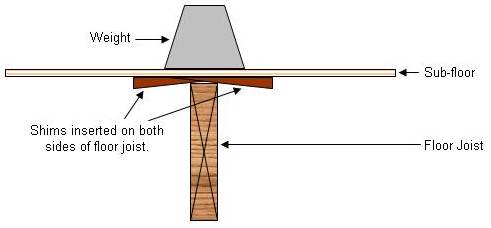
An alternative is to insert wood or composite material shims (Figure 10) between the sub-floor and the floor joists, using a construction adhesive to hold them in position.
These should be inserted from both sides of the floor joist and weight should be added to the finished floor to push down on the sub-floor and shims while the adhesive is drying, as shown in Figure 11.