Installing a tile backsplash, as shown in Figure 1, in a kitchen or bathroom is not a difficult project for the home handyman. Backsplashes allow the homeowner to be creative, make clean-up easier and enhance the value of the home.
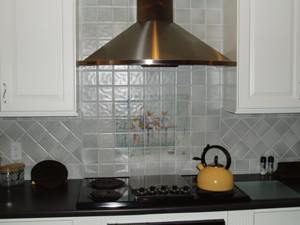
Figure 1 - Tile backsplash over cooktop
The basic materials, tile, adhesive, and grout can be purchased for less than $2.00 a square foot if your budget is tight. While hand painted murals or stainless steel tiles can easily exceed $100.00 a square foot.
Simply put, adding a backsplash involves spreading adhesive over the wall area and then applying the tiles. However, there are some tricks that will make the project easier to complete, look professional and last for many years to come.
- Using a knife or scrapper remove any caulking that is between countertops, cabinets and walls.
- Remove any dirt or grime on the wall surface. The adhesive will not adhere well to dirt, oil or grime.
- If the wall that is to be tiled has a very smooth finish (high gloss enamel paint), it should be scored or sanded to remove the majority of the gloss.
- Look at any 90 degree corners for excess drywall joint compound. Sand any areas smooth.
- Measure the area to be tiled and purchase the material. Backsplash tiles can vary dramatically in size, and before you can start the installation you have to know the tile size that you will be installing. Edge trim pieces must be purchased now, as the vast majority require installation prior to installing the tile.
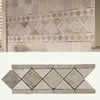
Figure 2 - Specialty marble backsplash tiles
- Layout: In most cases the wall above a stove and sink will be higher than the wall area between the countertop and cabinets. The recess created between cabinets is usually used as the center line for the tile project. The complexity of the layout is relative to how creative you want to be with patterns, edge pieces, highlight tiles and murals.
Double check all measurements!
It is impossible to provide a method of layout for the vast array of sizes and shapes of tiles that are available. Hence, the information that is provided concentrates on a basic installation of square or rectangular tiles without special edge pieces or highlight tiles.
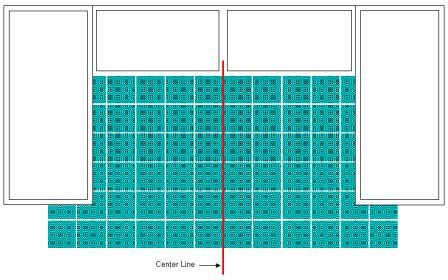
Figure 3 - Backsplash tile layout, even number of horizontal
Figure 3 shows the center line if the horizontal measurements would indicate an even number of tiles.
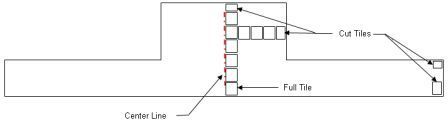
Figure 4 shows the center line if the horizontal measurements would indicate an odd number of tiles.
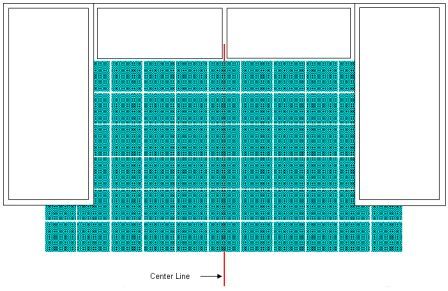
Figure 4 - Backsplash tile layout, odd number of horizontal tiles
Figure 5 shows the positions of tiles that most likely will need to be cut to size.