
Kitchen cabinetry comes in a vast variety of materials and finishes. Cabinets can be purchased as a DIY assembly, preassembled (standard sizes) and custom manufactured. Many products have their own unique terms to describe how they are made. Before you purchase kitchen cabinets it is important that you understand the terms used in kitchen cabinet construction.
Figure 1 and 2 are a custom manufactured group of kitchen cabinets. This is evident for a few reasons.
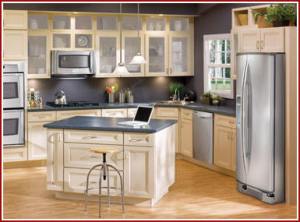
Figure 1 - Custom manufactured kitchen cabinets - style 1
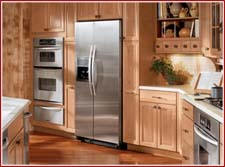
Figure 2 - Custom manufactured kitchen cabinets - style 2
- There is a kitchen island group of cabinets.
- The ovens are built in
- The refrigerator has a solid end wall that matches the cabinets and is built in to an area that perfectly matches the size of the refrigerator.
Don't miss out on our selection of kitchen pictures.
GLOSSARY OF KITCHEN CABINET TERMS:
The following is a glossary of terms used to describe kitchen cabinet construction.