
Step 4:
Install the opposite side and the front 2 x 4's, as shown in Figure 5. Use yellow carpenter's glue and 3 1/2 inch or 4 inch # 8 or # 10 wood screws. Countersink the wood screws, so that you can add wood fill and sand prior to painting.
You will need a helper or a scrap piece of lumber to hold the side and front members in position until the front 2 x 4 supports are measured and cut.
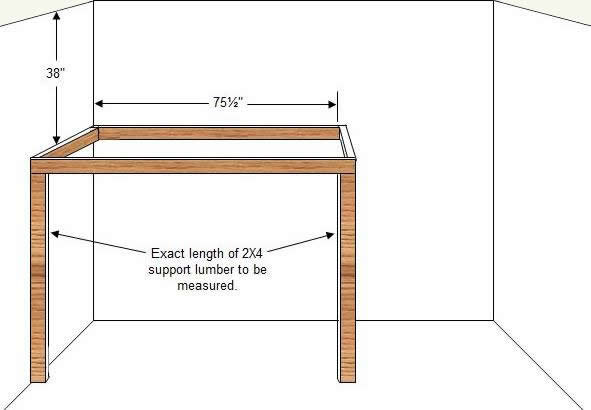
Figure 5 - Mounting opposite side and front horizontal 2 x 4 members and front posts.
It is important that the 2 x 4 bed frame members be configured in a specific manner, as shown in Figure 6. Configuring them in a different manner will make assembly more difficult.

Figure 6 - Loft bed frame construction
Once the frame is complete, measure the height at the position of the support posts. Remember that the floor is probably not perfectly level and you want the bed frame to be level.
Step 5:
Install the back and wall side horizontal desk supports, as shown in Figure7 and the open side 2 x 4 desk supports, as shown in Figure 8. The open side desk support also provides strength to the front support post. If you do not want to install a desk, you must still install the support for the front post.

Figure 7 - Horizontal side and back wall desk supports
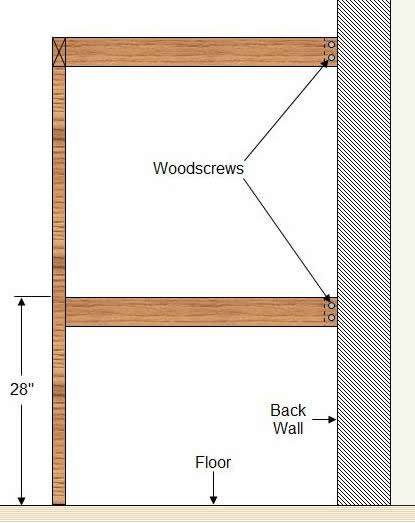
Figure 8 - Open side of loft bed horizontal desk and front post support.
Note: We chose a finished desk height of approximately 28 3/4 inches. This is a typical desk height, however you can adjust the height to suit your child or other requirements.
All fastening should be done using yellow carpenter's glue and the wood screws as previously described.