
Locating the building lines on the batter boards is done by stretching a mason’s line between batter boards at right angles to each other, as shown in Figure 7.
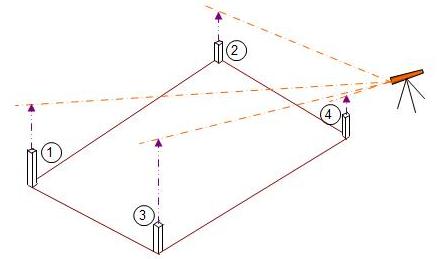
Figure 6 - Using transit level -2
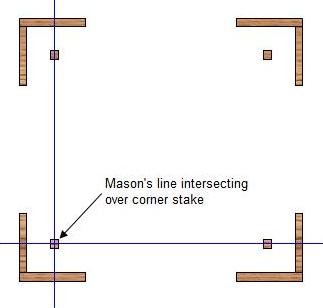
Figure 7 - Mason's line over stake
The mason’s lines are kept in place by attaching them to bricks, as shown in Figure 8.
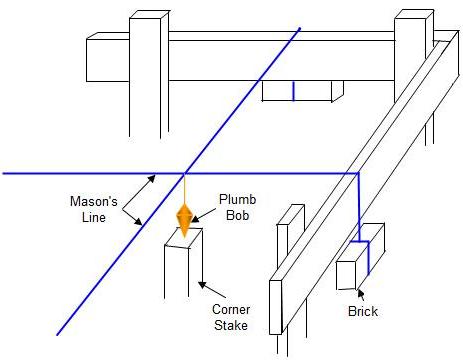
Figure 8 - Using plumb bob over stake
The lines are adjusted with a plumb bob until they intersect directly over the tack on the corner stake, as shown in Figure 7. Mark the location of the mason’s line along the batter board and cut a notch in it. Place the line on the notch, wrapping it around the ledger board a few times and tie it to a nail, as shown in Figure 9.
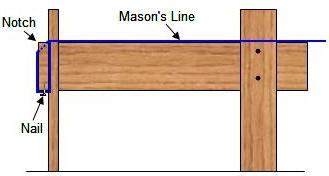
Figure 9 - Mason's line around batter board
Check the line for level by using a line level. The corner building stakes can now be removed.
Once the building lines have been located, you can mark off the distance along the batter boards to the excavation lines. You should excavate at least 3 feet out from the actual building lines to allow yourself room to work on the foundations, as shown in Figure 10.
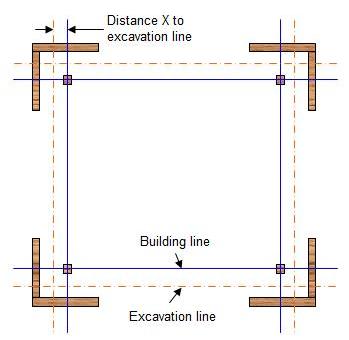
Figure 10 - Batter boards indicating excavation line
Cut notches at this point too, and transfer the mason’s line from the building line to the excavation line notch. Using a plumb bob, drive a stake directly under the intersection of the stretched excavation lines. This locates the excavation corners. Remove all lines from the batter boards. You are ready to start the building excavation.