With this done, mix a batch of firebrick mortar to bond the firebrick to the sub-hearth. Any irregularities in the concrete sub-hearth surface can be evened out with the mortar. To protect the firebrick form being damaged by dropping mortar later on, cover it with a layer of sand.
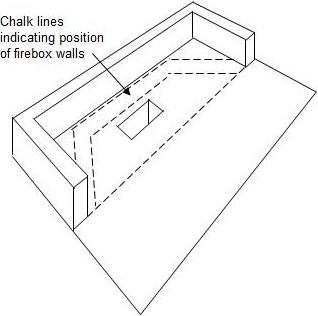
Figure 9 - Determining position of firebox walls
Once the concrete has cured, remove any form material that is still accessible. Don’t forget, before moving on to your next task, to cut a hole in the plywood form below the ash dump to allow ashes to fall through.
Firebox:
Because of its sloping and angled walls, the construction of the firebox is rather tricky. Firebox walls can be erected simultaneously with the outside walls or after the outside walls have been brought to the height of the damper.
Start by chalk-marking the firebox walls on the hearth. Since the damper rests directly on these walls, it is important to have the damper sitting there, right next to you for reference during the entire process. Determine the center line of the firebox opening and measure to each side one-half the length of the damper, as shown in Figure 10. For example, if the damper is 36″ long, you measure 18″ to either side. This will give you the location of the firebox walls.
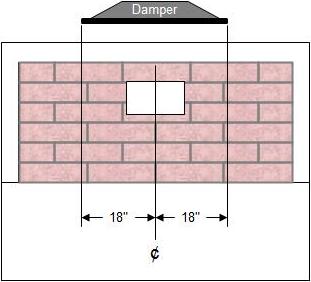
Figure 10 - Locating firebox walls
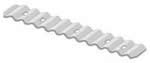
Figure 11 - Brick tie
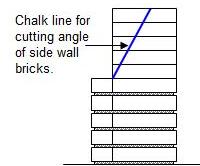
The back and side walls of the firebox are laid straight and plumb to approximately 12″ to 16″, as indicated in your design. Here, too, you must use firebrick mortar applied in thin layers of about 1/8″ to 1/4″ thick. Use brick ties, Figure 11, at the corners where the three walls meet. Before building the sloping wall section, continue laying the side walls, this time with no mortar, as shown in Figure 12. In order to meet the angle of the back sloping wall, the brickwork on the side walls will require cutting.
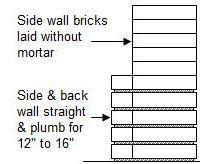
Figure 12 - Firebox side wall without mortar
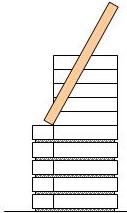
Figure 13 - Marking firebox angle