Note: The following information on How To Paint Kitchen Cabinets applies equally as well to painting bathroom cabinets and vanities.
Many homeowners believe that How To Paint Kitchen Cabinets are the poor mans method of performing a kitchen remodeling project. This couldn't be farther from the truth!
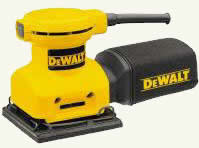
As shown in Figure 1, painted kitchen cabinets can add a new dimension to any kitchen, look exceptionally pleasing to the eye and enhance the overall kitchen space.
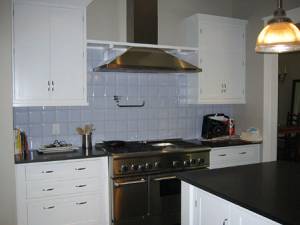
Figure 1 - Painted kitchen cabinets
In my opinion, kitchen cabinets, properly finished with a durable enamel paint, have more appeal than inexpensive laminate cabinets.
As with most home improvement projects, the difference between a true quality finished project and one that is sub-standard is the prep work, tools and materials used.
Painting The Cabinets:
- Remove everything from the cabinets and take the items out of the room. Many individuals try to paint around piles of pots, pans, dishes and other kitchen or bathroom items that were stored in the cabinets and drawers. To do a proper job you need unencumbered space to work in.
- Remove the range or stove and the refrigerator from the kitchen. In most cases it will be necessary to paint the side walls of the cabinets that house the major appliances, trying to do this while they are still in place will be extremely frustrating.
- If you are going to apply fresh paint to the kitchen ceilings and walls, do it before you paint the cabinets. Remember to cover and protect the counter tops and the floor with drop clothes or heavy plastic sheeting. Inexpensive thin polyethylene drop cloths provide little protection.
- Remove any under cabinet appliances, such as clock radios, CD players, can openers, over the range vent fans and microwave ovens.
- Remove the cabinet doors and the drawers. The cabinet doors and drawers are finished independent of the cabinets and instructions follow the cabinet painting exercise. You can work on the doors and drawers while waiting for undercoats, primers or other chemicals to work and/or dry.
- Remove any cabinet hardware attached to the cabinets such as latches, catches, hinges, cup hooks.
- Remove any cabinet, cabinet drawer or cabinet door organizers.
- Clean the inside and outside areas of the cabinets, including the back cabinet walls. Ensure that all grease, grime and dirt has been thoroughly removed, use fine sandpaper and/or steel wool if necessary. Remember, that the quality of the finished project is relative to the preparation work done.
- If you are going to add items such as drawer slides or add adjustable or fixed shelving now is the time to do any cabinetry work that may be required to accommodate those changes. This is also the time to do any repairs to the structure of the cabinets ensuring that the door stiles are plum, level and square with respect to the bottom and tops of the cabinets.
- Fill any holes and/or cracks in the cabinet wood. If you are replacing the hinges and door catches, which I highly recommend, fill the hinge screw holes as well. Use a high quality wood filler that does not shrink and can be painted. Sand the filler smooth. Use a vacuum and a tack cloth to pick up the sanding dust. Make sure that all the dust has been removed!
- Use a palm sander (Figure 2) to sand the front face of the cabinets.
Mark the cabinet doors and drawers with position numbers on the bottoms of doors from base cabinets and on the top of the doors from upper or wall cabinets and on the bottom of drawers to ensure that they are returned to the same location so that they will fit properly when reinstalled.
Note: It is always wise to use the proper protective and safety products when sanding and using any chemicals such as paint strippers. These include; eye protection, dust masks, work gloves, ear protection and respirators.
The amount of sanding necessary is relative to the amount of paint currently on the cabinet face. You do not have to sand the cabinet faces down to to bare lumber, they just need to be smooth - any "gloss" should be removed.