
Aluminum & Copper Wire:
The first and most important rule is that aluminum and copper wires should not be connected to one another under any condition. As well, not all devices are approved for use with aluminum wire.
As shown in Table 1, devices that are approved for aluminum wire have the letters Al in a circle somewhere on the device, those that are only approved for copper will have the letters Cu in a circle on the device.
| Table 1 - Device Markings | ||
 |
 |
 |
Use with copper wire. |
Use with aluminum wire |
DO NOT use with aluminum wire |
Using copper only, approved devices for aluminum wire will lead to overheating of the device and most probably cause a fire.
Do not connect aluminum wire to copper wire. This includes the use of a wire nut. Using aluminum wire requires special care, techniques and products.
Additional information on aluminum wiring
A bit of terminology. A "cable" is the entire item which contains a number of wires which are independently insulated (with the exception of the ground wire).
Figure 1 - Wire stripper

Figure 2 - Cable ripper
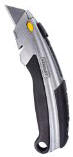
Figure 3 - Utility knife
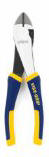
Figure 4 - Diagonal cutters
Stripping Cable To Expose The Wires:
If you are planning to do a lot of electrical work then I would highly recommend that you purchase a wire stripping tool, as shown in Figure 1. You may also want to consider purchasing an inexpensive cable ripper, as shown in Figure 2. Both of these tools will save you a lot of time and allow you to terminate wires without damaging them.
If you are not planning on doing a lot of electrical work then you can get away with a utility knife, as shown in Figure 4, and a pair of diagonal cutters as shown in Figure 5.
One of the common mistakes made when attempting to terminate wires is not stripping enough wire from its cable sheath.
I recommend that you strip at least 9" of cable, you can always cut off the excess. Leaving wires short, leads to trying to perform terminations inside the electrical box, which ends up having poor connections and loose wire nuts or screw terminals.
The cable ripper conveniently removes the jacket from the cable, exposing the wires without nicking the outer jacket of the wire.
To use a utility knife:
- Straighten and flatten the end of the cable so that it does not have any bends or twists in it as shown in Figure 5.
- Place the utility knife blade in the center of the jacket of the cable, over the ground wire, as shown in Figure 6, and score the outer sheath. Pull the jacket down from the top of the cable.
- Using a pair of side cutters, Figure 4, cut off the excess cable jacket exposing the wires as shown in Figure 7.

Figure 5 - Electrical cable straightened and flattened

Figure 6 - Utility knife blade in center of cable jacket
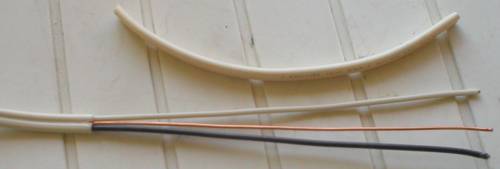
Figure 7 - Cable jacket removed exposing wires
Inspect the wire insulation along its full length and in the area where the sheath was cut away from the rest of the cable looking for any cuts or nicks in the insulation. Nicks in the insulation can be repaired using electrical tape.
Installing or replacing a receptacle (outlet)