
- Have someone hold the picture in the position you want it and mark the top of the picture frame with a small pencil mark, as shown in Figure 7. (If you require horizontal axis positioning (step 9) also mark the vertical side of the picture that is closest to an adjacent wall with a small pencil mark.)
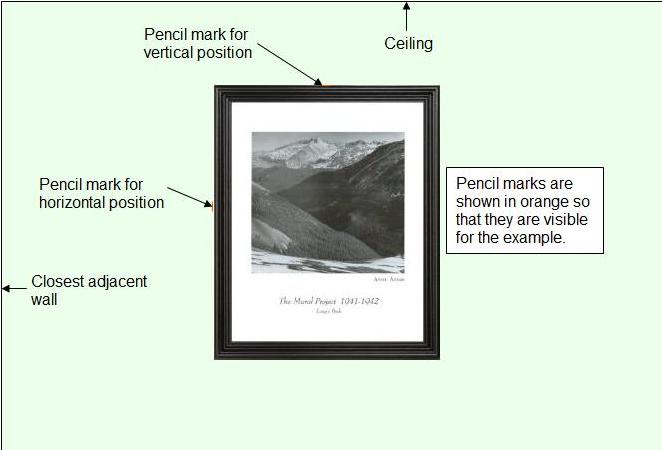
Figure 7 - Positioning picture on wall
- Measure the height from the ceiling to the pencil mark, and write that number on the piece of paper. For this example we will use 10 inches as the height from the ceiling to the top of the picture frame.
- Add the distance for the wire to the top of the picture frame – 3 inches to the 10 inches, the pencil mark to the ceiling distance which is a combined distance of 13 inches.
- Measure that combined distance, which in our case would be 13 inches, from the ceiling, and make a small mark on the wall. That mark is the position of the top of the picture frame wire, which is where you want the support portion of the picture hanger to end up.
Note: It is important that the tape measure be perfectly vertical. I suggest the use of a level to ensure that you are not measuring on an angle.
- There are many different types of picture hangers and you will have to determine where the fixing portion of the hanger must be in order for the hanger support to end up in the location that you have marked on the wall.
As an example, if you are using the a common picture hook, as shown in Figure 8, the point of the nail must be placed above the mark on the wall so that the upper portion of the bottom of the picture hook is at the mark on the wall, as shown in Figure 9.
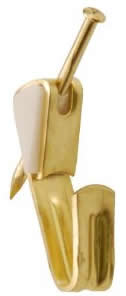
Figure 8 - Picture hook
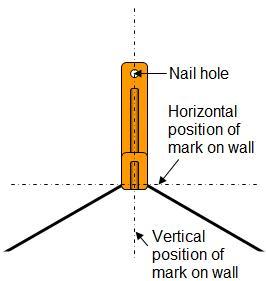
Figure 9 - Picture hook positioning
If you require exact positioning on the horizontal axis as well as the vertical axis follow these steps.
- In step 4 where the vertical position of the picture was marked, also mark the side of the picture that is closest to an adjacent wall with a small pencil mark on the wall.
- Measure the width of the picture and divide that number in half. Write that number down on a piece of paper. For purposes of this example we will use a width of 20 inches. Twenty inches divided in half is 10 inches.
- Measure the distance from an adjacent wall to the pencil mark. Write that number down on the piece of paper. We will use a distance of 45 inches.
- Add the 45 inches to the 10 inches (55 inches) and this will give you the horizontal axis position. The center of the picture hanger should be 55 inches from the adjacent wall.
Based on our measurements the position of the upper portion of the bottom of the picture hook should be positioned 55 inches from the adjacent wall on the horizontal axis and 13 inches from the ceiling on the vertical axis, as shown in Figure 10.
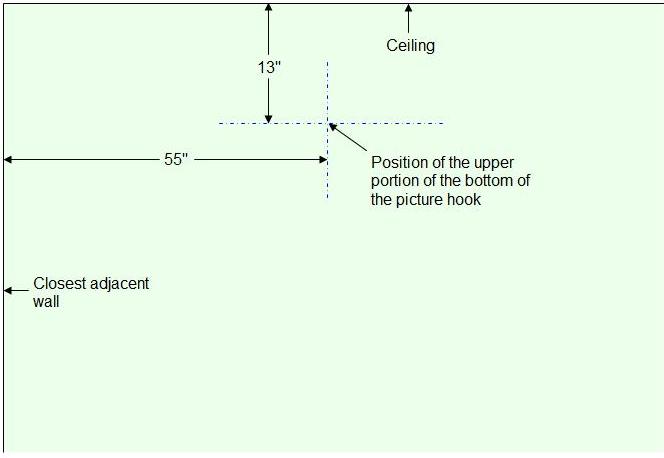
Figure 10 - Position of picture hook on wall
Additional information on the correct height to hang pictures.
Also see our article on hanging pictures on stairs.
back to picture hanging Part 1